GNOME Shell Extensions & CI: Part III
In the last part of the series, I explain how I set up continuous integration tests using podman and GitHub Actions.
If you haven’t read the first parts yet, I would suggest doing this before. Here are links to the other parts:
- Bundling the Extension
- Automated Release Publishing
- Automated Tests with GitHub Actions (this post)
GNOME Shell in a Container
So the idea is to run GNOME Shell in a container, install the extension, and perform various tests on it. For this purpose, I created several Fedora-based containers, one for each GNOME Shell version I want to run tests on. These containers are currently available:
- ghcr.io/schneegans/gnome-shell-pod-32: GNOME Shell 3.36 (based on Fedora 32)
- ghcr.io/schneegans/gnome-shell-pod-33: GNOME Shell 3.38 (based on Fedora 33)
- ghcr.io/schneegans/gnome-shell-pod-34: GNOME Shell 40 (based on Fedora 34)
- ghcr.io/schneegans/gnome-shell-pod-35: GNOME Shell 41 (based on Fedora 35)
- ghcr.io/schneegans/gnome-shell-pod-36: GNOME Shell 42 (based on Fedora 36)
- ghcr.io/schneegans/gnome-shell-pod-37: GNOME Shell 43 (based on Fedora 36)
So here’s an example what you can do with these containers (you will need to have podman and imagemagick installed).
Run the following commands one by one.
The first command will download and run a container based on Fedora 33.
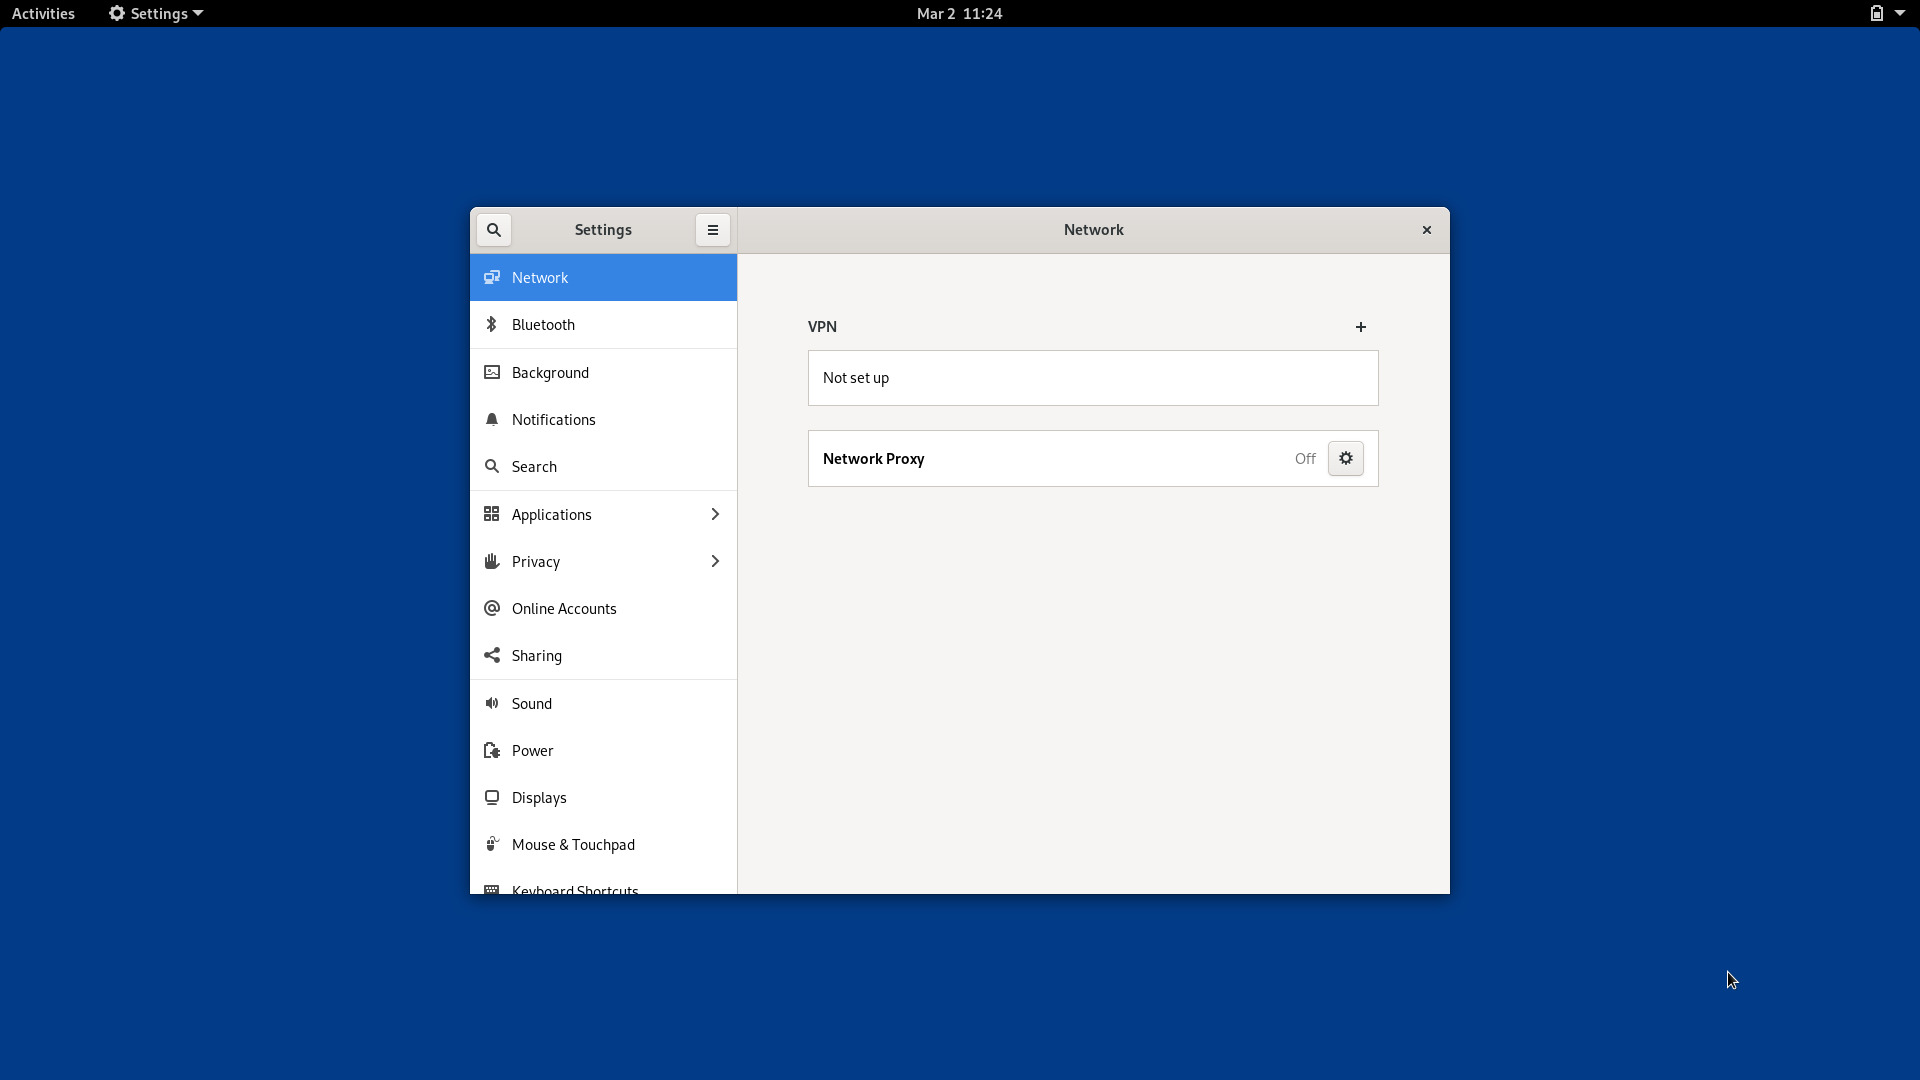
You can then use the two other commands to run GNOME Shell, and open the gnome-control-center inside the container.
1
2
3
4
5
6
7
8
9
# Run the container in interactive mode.
podman run --rm --cap-add=SYS_NICE --cap-add=IPC_LOCK \
            -ti ghcr.io/schneegans/gnome-shell-pod-33

# Now do this inside the container to start GNOME Shell.
systemctl --user start "gnome-xsession@:99"

# For example, you can now run this command.
DISPLAY=:99 gnome-control-center
Did it work? Well, we will see! Open up another terminal on your host and execute the following commands. These will capture a screenshot of GNOME Shell inside the container!
1
2
3
4
5
6
7
8
9
# Copy the framebuffer of xvfb.
podman cp $(podman ps -q -n 1):/opt/Xvfb_screen0 .

# Convert it to jpeg (this step requires imagemagick).
convert xwd:Xvfb_screen0 capture.jpg

# And finally display the image.
# This way we can see that GNOME Shell is actually up and running!
eog capture.jpg

To shut down the container, hit Ctrl+C to kill the GNOME control center and execute poweroff to exit the container.
I think you see where this is going. In the next example, we will perform the same steps, but with a non-interactive container. You can copy-paste the entire block below to your terminal and execute it all together.
1
2
3
4
5
6
7
8
9
10
11
12
13
14
15
16
17
18
19
20
21
22
23
24
25
26
27
28
29
30
31
32
33
34
35
36
37
# Run the container in detached mode.
POD=$(podman run --rm --cap-add=SYS_NICE --cap-add=IPC_LOCK \
                  -td ghcr.io/schneegans/gnome-shell-pod-33)

# This method is used to run arbitrary commands inside the running container.
# The set-env.sh script is contained in the container image and sets all
# environment variables required to interact with the D-Bus.
# You can look at the script here:
# https://github.com/Schneegans/gnome-shell-pod/tree/master/bin
do_in_pod() {
  podman exec --user gnomeshell --workdir /home/gnomeshell \
              "${POD}" set-env.sh "$@"
}

# Wait until the user bus is available. This is also a custom script
# contained in the container.
do_in_pod wait-user-bus.sh

# Start GNOME Shell.
do_in_pod systemctl --user start "gnome-xsession@:99"

# Wait some time until GNOME Shell has been started.
sleep 3

# Run the application.
do_in_pod gnome-control-center &

# Wait another few seconds.
sleep 3

# Now make a screenshot and show it!
podman cp ${POD}:/opt/Xvfb_screen0 . && \
       convert xwd:Xvfb_screen0 capture.jpg && \
       eog capture.jpg

# Now we can stop the container again.
podman stop ${POD}
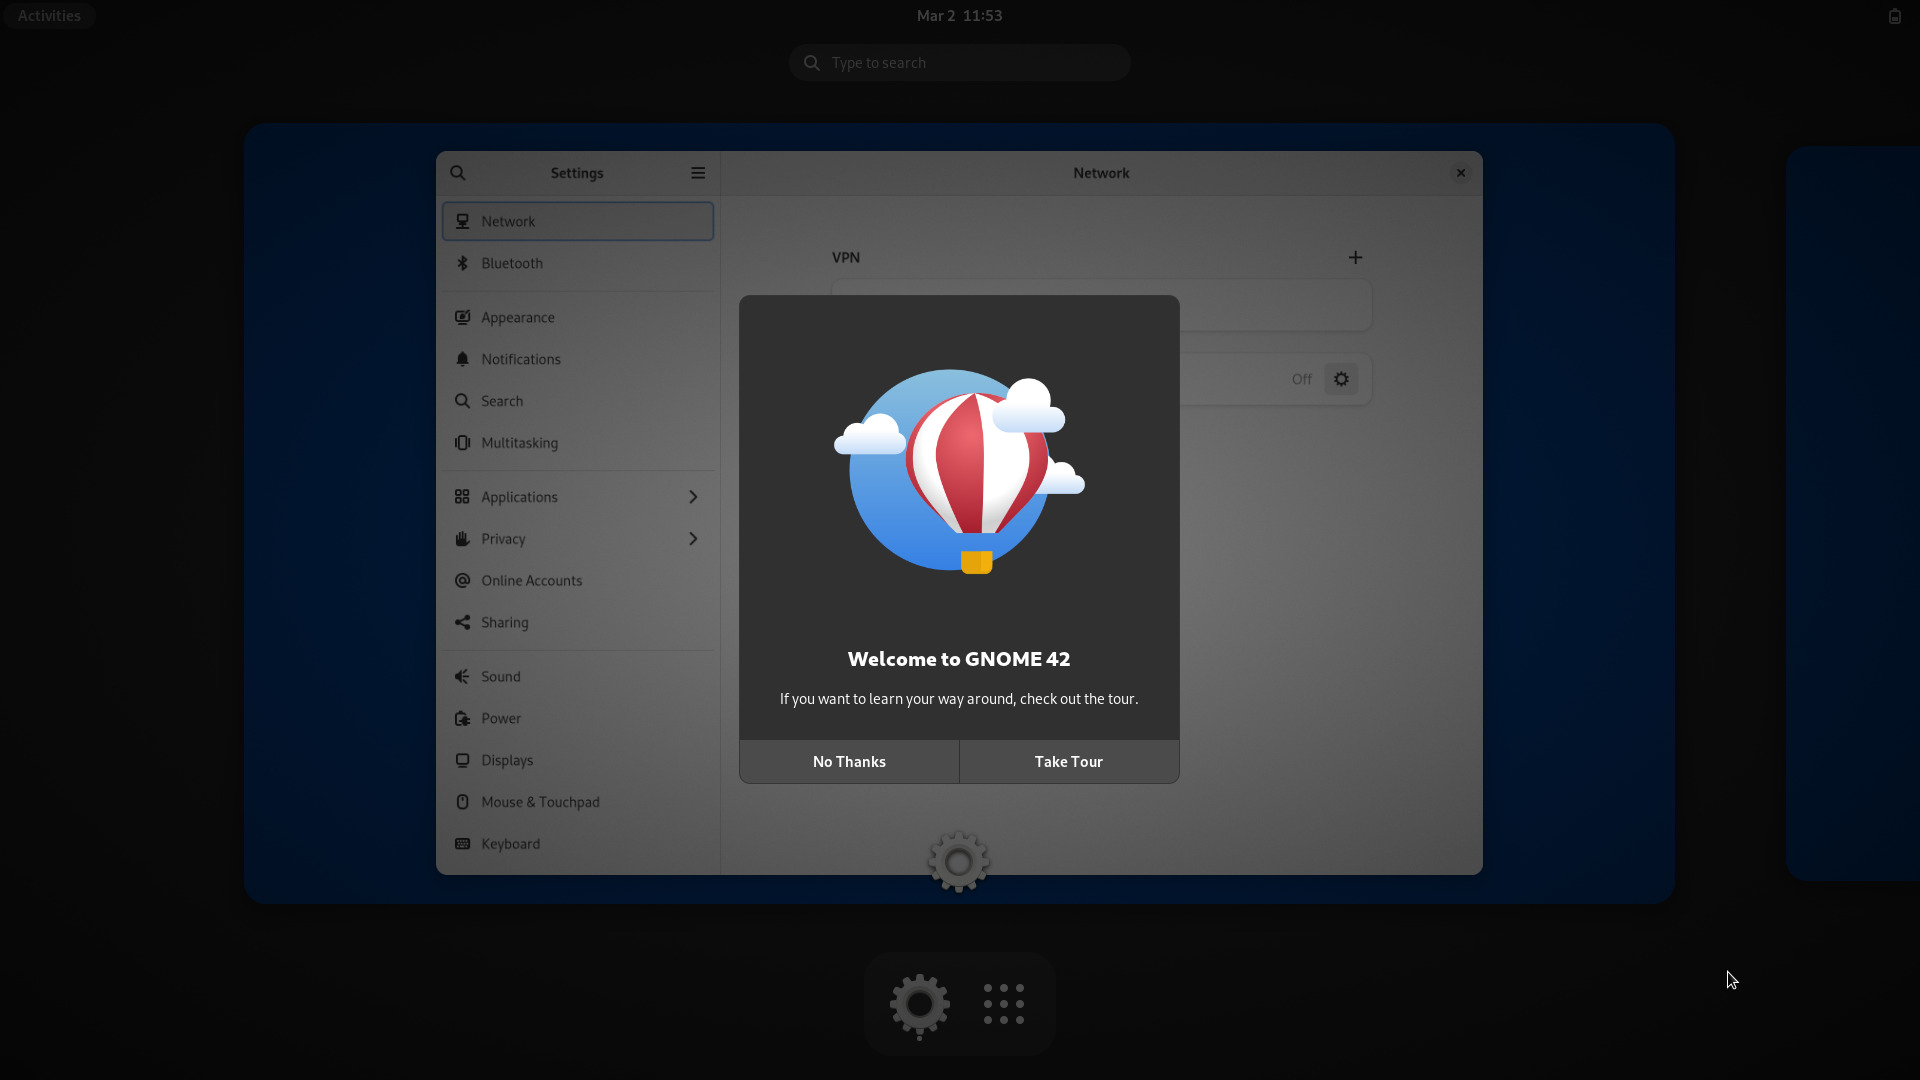
Feel free to replace the gnome-shell-pod-33 with any other container image name. For example, gnome-shell-pod-36 will give you GNOME Shell 42 (we will have to disable this welcome tour later…):

Executing Tests in the Container
We can now use this setup to run automated tests inside the containers.
First, you want to copy your extension zip into the container (podman cp).
Then you install and enable your extension with gnome-extensions install and gnome-extensions enable respectively.
Thereafter, launch GNOME Shell and closes the initial overview & welcome tour of GNOME 40+.
Finally, you can for instance open the settings dialog, take a screenshot and look for its presence!
An example of this is the test script of the Desktop Cube extensions.
This is just a minimal example for how such a testing script could look like.
Of course, you can do this completely differently!
You could also add a test API to your extension which you call from the script.
There are many other things which could be done and with a bit of creativity.
For example, the test script of Fly-Pie uses xdotool to move the mouse pointer and to click on menu items.
A more Complex Example: Burn-My-Windows
To test the animations of the Burn-My-Windows extensions, I added a test-mode boolean setting which can be enabled using gsettings set during the tests.
This causes all animations to just show one fixed frame for a period of five seconds (this ensures that all screenshots will capture the same moment of the animations).
Furthermore, it makes sure that all calls to Math.random() are effectively disabled.
Then, I created a script which generates reference images for all supported GNOME versions / X11 / Wayland / all window-open animations / all window-close animations. This makes up for a total of 200+ test cases. Below, you can see the reference images for some included effects. You can observe, how they slightly differ from configuration to configuration.
The test script of Burn-My-Windows then re-captures all those images and compares them with the reference versions.
| Energ. A | Energ. B | Fire | Portal | Hexagon | |
|---|---|---|---|---|---|
| GNOME 3.36, Wayland, Open |  |
 |
 |
 |
 |
| GNOME 3.36, Wayland, Close |  |
 |
 |
 |
 |
| GNOME 3.36, X11, Open |  |
 |
 |
 |
 |
| GNOME 3.36, X11, Close |  |
 |
 |
 |
 |
| GNOME 3.38, Wayland, Open |  |
 |
 |
 |
 |
| GNOME 3.38, Wayland, Close |  |
 |
 |
 |
 |
| GNOME 3.38, X11, Open |  |
 |
 |
 |
 |
| GNOME 3.38, X11, Close |  |
 |
 |
 |
 |
| GNOME 40, Wayland, Open |  |
 |
 |
 |
 |
| GNOME 40, Wayland, Close |  |
 |
 |
 |
 |
| GNOME 40, X11, Open |  |
 |
 |
 |
 |
| GNOME 40, X11, Close |  |
 |
 |
 |
 |
| GNOME 41, Wayland, Open |  |
 |
 |
 |
 |
| GNOME 41, Wayland, Close |  |
 |
 |
 |
 |
| GNOME 41, X11, Open |  |
 |
 |
 |
 |
| GNOME 41, X11, Close |  |
 |
 |
 |
 |
| GNOME 42, Wayland, Open |  |
 |
 |
 |
 |
| GNOME 42, Wayland, Close |  |
 |
 |
 |
 |
| GNOME 42, X11, Open |  |
 |
 |
 |
 |
| GNOME 42, X11, Close |  |
 |
 |
 |
 |
| GNOME 43, Wayland, Open |  |
 |
 |
 |
 |
| GNOME 43, Wayland, Close |  |
 |
 |
 |
 |
| GNOME 43, X11, Open |  |
 |
 |
 |
 |
| GNOME 43, X11, Close |  |
 |
 |
 |
 |
Running the Tests on GitHub
1
2
3
4
5
6
7
8
9
10
11
12
13
14
15
16
17
18
19
20
21
22
23
24
25
26
27
28
29
30
31
32
33
34
35
36
37
38
39
40
41
42
43
44
45
46
47
48
49
50
51
name: Tests

on:
  push:
    branches:
      - '**'
  pull_request:
    branches:
      - '**'

jobs:
  tests:
    name: Run Tests
    runs-on: ubuntu-latest
    if: >
      github.event_name == 'pull_request' ||
      ( contains(github.ref, 'main') && !contains(github.event.head_commit.message, '[no-ci]') ) ||
      contains(github.event.head_commit.message, '[run-ci]')
    strategy:
      fail-fast: false
      matrix:
        version:
          - '32'
          - '33'
          - '34'
          - '35'
          - '36'
          - '37'
        session:
          - 'gnome-xsession'
          - 'gnome-wayland-nested'
    steps:
    - uses: actions/checkout@v2
    - name: Download Dependencies
      run: |
        sudo apt update -qq
        sudo apt install gettext -qq
    - name: Build Extension
      run: make zip
    - name: Test Extension
      run: sudo $GITHUB_WORKSPACE/run-test.sh -v ${{ matrix.version }} -s ${{ matrix.session }}
    - uses: actions/upload-artifact@v2
      if: failure()
      with:
        name: log_${{ matrix.version }}_${{ matrix.session }}
        path: fail.log
    - uses: actions/upload-artifact@v2
      if: failure()
      with:
        name: screen_${{ matrix.version }}_${{ matrix.session }}
        path: fail.png
As a final step, we need to run those test via GitHub Actions.
To do this, save the above YAML code as .github/workflows/tests.yml in your extension repository.
The workflow will be run on each push and each pull request.
However, I usually do not need to run all tests on all pushes to branches except for the main branch.
Therefore, I added the interesting if in line 15: This ensures that the tests are only executed in three cases:
- If the push happened to be part of a pull request.
- If something was pushed to
mainand the commit message did not contain[no-ci]. - If something was pushed to any branch and the commit message did contain
[run-ci].
The run-tests.sh script will then be executed for each combination of the Fedora versions and Wayland / X11.
Whenever a test fails, the fail.png and fail.log will be uploaded (these are produced by the linked example test script if any of the tests fails).
As before, the “Download Dependencies” step may not be necessary for your extension.
Wrapping Up
I hope that you learned something from these guides! Maybe, one or the other aspect can be applied to your extension as well. If you have any questions, suggestions, or alternative solutions, feel free to post a comment!