Create a cinematic image!
You were on holidays and all your pictures look a little… dull? Maybe this quick tutorial will give you some inspiration!
Improving the white balance
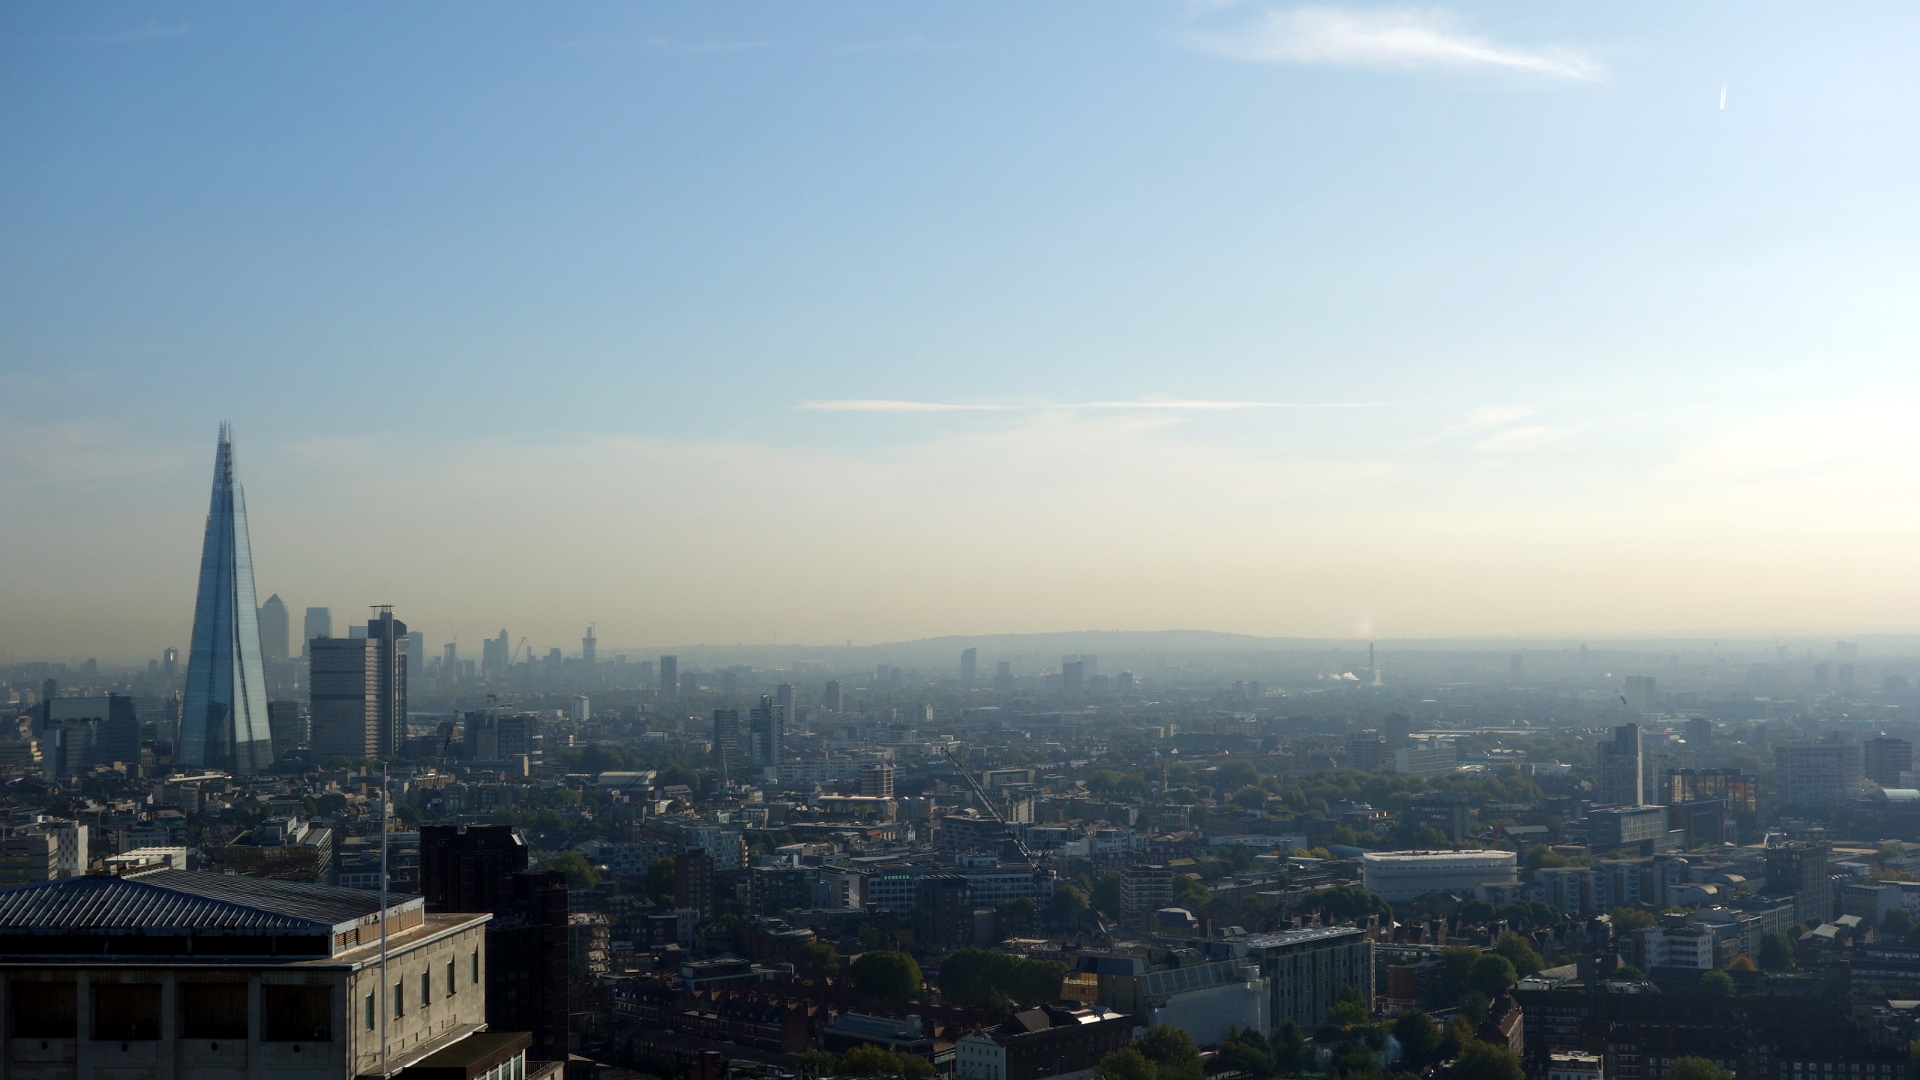
Last weekend I was at the London Eye and took the following photograph. It features an interseting view at the Shard but it looks quite boring. So I decided to use my favourite image manipulation program, the gimp, to enhance the picture.

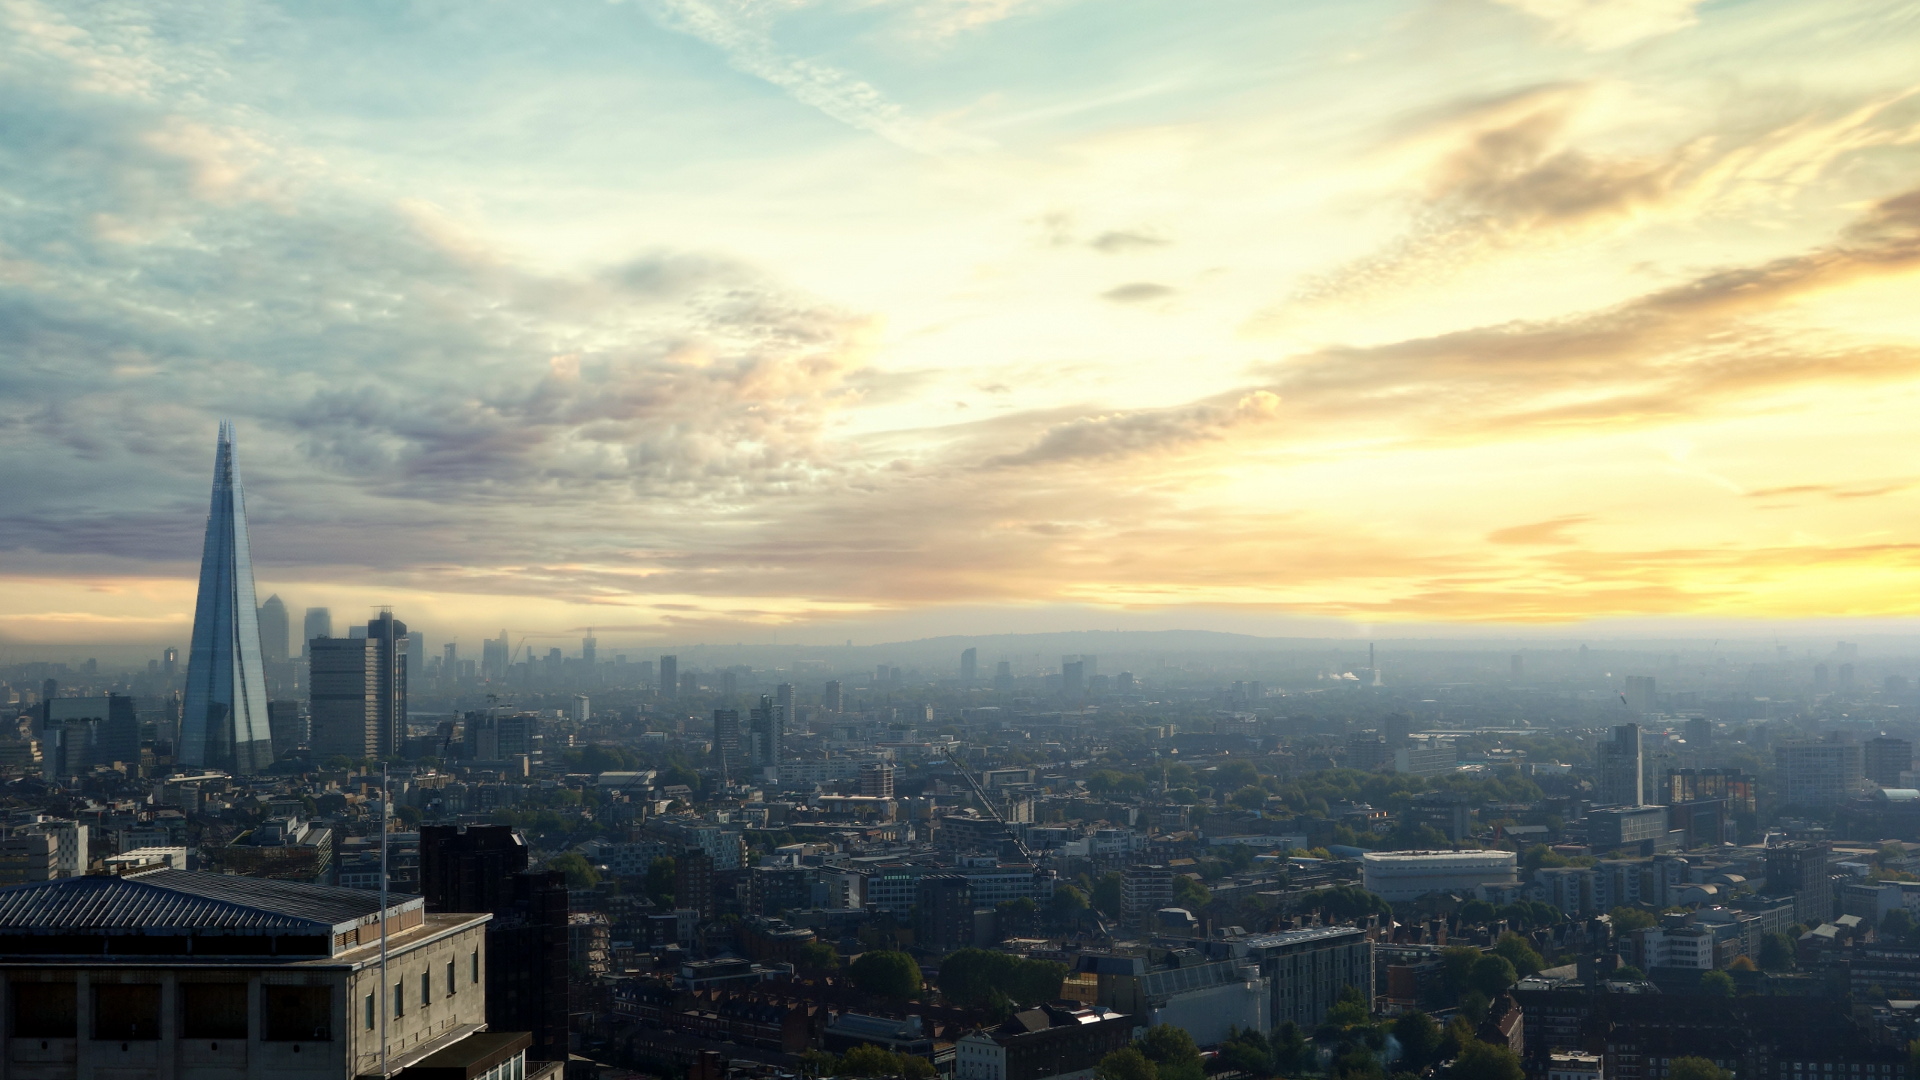
At first, I improved the white balance. There is a lot of haze in this picture and a bit of contrast will serve well. So I chose Colors > Auto > White Balance. The result is below. It looks much crispier! Move your mouse over the image below to explore the differences!
Replace the sky
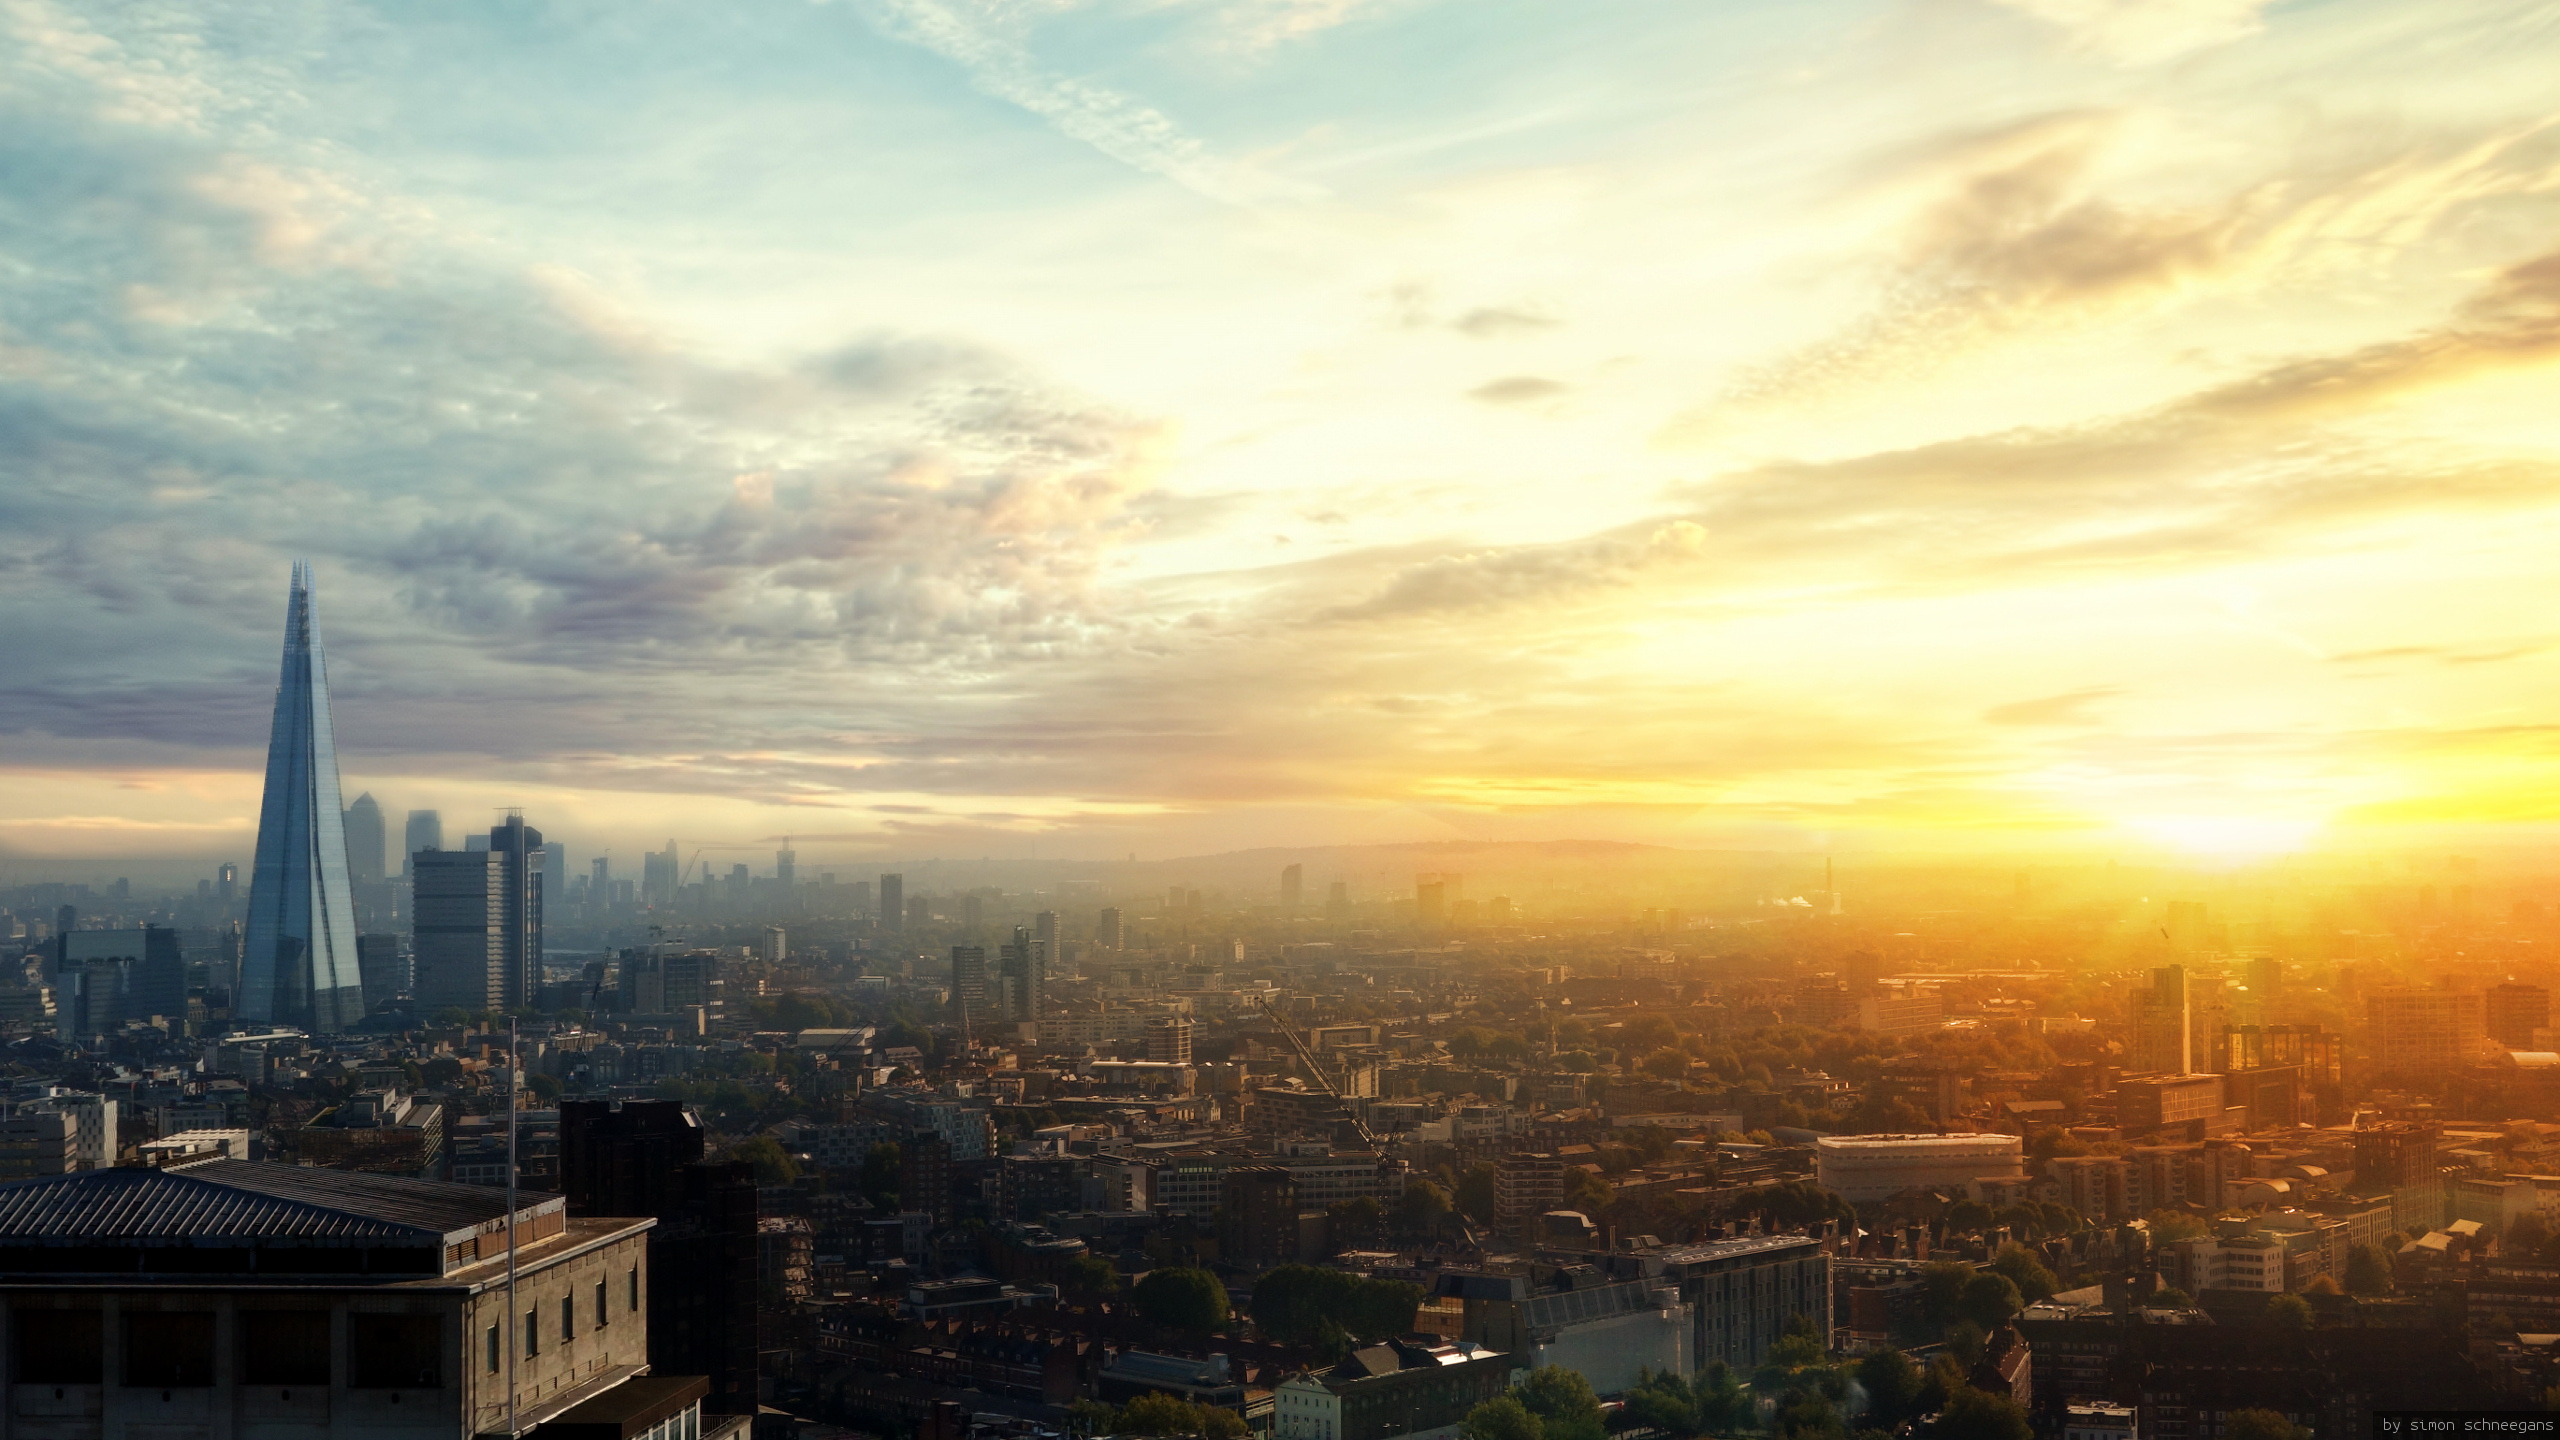
Since the blue sky of the original image is a little plain, I searched the internet for a better sky. Eventually I found this image. It’s very beautiful and I really would like to credit its original author but I failed to find his or her name.
I deleted the sky from the original image with the eraser tool and pasted the new sky to a new layer below the original image.


Color grading of the foreground
The picture looks quite interesting, but we need to adjust the colors of the skyline. Therefore I duplicated the skyline layer and tinted the copy to some warm orange with Colors > Colorize.... Then I deleted most of the tinted version; only on the right hand side where the sun is supposed to be I kept the orange version.


The sun glare
Finally I used some additional sunrise images to add a sun glare to the image. I used this CC by SA image by Zimmermanns and this public domain image. I put both on separate layers, moved them around, blurred, mirrored and erased some parts. Both blend modes were set to Soft Light.


Final comparison
That’s it! You can download the full resolution result here. Below you can check the differences between the original photo and the final version. Please post a link in the comments if you created some cool images with a similar technique!