Summary
Gnome-Pie is a circular application launcher (pie menu) for Linux. It is made of several pies, each consisting of multiple slices. The user presses a key stroke which opens the desired pie. By activating one of its slices, applications may be launched, key presses may be simulated or files can be opened.
The concept of Gnome-Pie
Gnome-Pie is designed to be fun, fast and visually appealing. It implements Fitts’ law, which…
- Wikipedia
Many application launchers of today’s Linux desktops are made for people using their keyboard mainly. Launchers like Gnome-Do, Synapse, Kupfer, Unity’s Dash or Gnome-Shell’s Activities are designed for keyboard users. It’s necessary to type the first letters of the desired action in order to launch it.
Gnome-Pie uses a different approach: The user does not need to remember the name of an application - just the direction has to be remembered. Combined with the implementations of Fitts’ law - users don’t have to click directly on the icon of an action, but somewhere on the screen in its direction - Gnome-Pie is an alternative to text-based launchers.
The clip below (Gnome-Pie 0.6.1) shows how to create a launcher with Gnome-Pie in your dock. This launcher will work as if you had some kind of folder in your dock.
Installation of Gnome-Pie

Besides from installing from source there are other ways to install Gnome-Pie. I maintain a PPA for easy installation on ubuntu-ish distributions and there are several repositories for other distributions, like Arch Linux.
Installation from my PPA
This will add my PPA as a package source to your system and will work for Ubuntu and similar distributions. Simply enter the following commands in a terminal.
sudo add-apt-repository ppa:simonschneegans/testing
sudo apt-get update
sudo apt-get install gnome-pie
When this is done, you can launch the application via your main menu. It will start silently, only an indicator in your panel will be visible. Press Ctrl-Alt-A to open an example pie.
Installation from source
This is not more difficult at all. First of all, install all dependencies - below you will find the appropriate commands for Fedora and Ubuntu; if you have another package manager you’ll have to change this command accordingly. The dependency libappindicator3-dev is optional, if your distribution does not support this system, simply ignore it.
sudo apt-get install git build-essential libgtk-3-dev libcairo2-dev libappindicator3-dev libgee-0.8-dev libxml2-dev libxtst-dev libgnome-menu-3-dev valac cmake libwnck-3-dev libarchive-dev libbamf3-dev bamfdaemonsudo dnf install cmake make automake gcc gcc-c++ vala gtk3-devel libwnck3-devel libgee-devel libxml2-devel libXtst-devel gnome-menus-devel libarchive-devel bamf-develMake sure, that you have a version of the vala compiler which is at least 0.24. You may check your current version by running valac --version. If it does not fit, please install a newer version. In Ubuntu 14.04 or later this can be done with the following commands:
sudo add-apt-repository ppa:vala-team/ppa
sudo apt-get update
sudo apt-get upgrade
Then download Gnome-Pie from GIT and compile it:
git clone git://github.com/schneegans/Gnome-Pie.git
cd Gnome-Pie
If you feel adventurous and want to use the most recent in-develop version of Gnome-Pie (which is likely to behave strangely or not to work at all) use the following command. Else skip it.
git checkout developThen finally compile Gnome-Pie.
./make.shNow you can launch your local version of Gnome-Pie:
./gnome-pieGnome-Pie works fine when launched this way but you can also install it system wide for all users:
cd build && sudo make installThis way you can launch the application via your main menu. It will start silently, only an indicator in your panel will be visible. Press Ctrl-Alt-A to open an example pie.
Using Gnome-Pie

Tweaking the behavior of Gnome-Pie
By clicking on the panel-indicator of Gnome-Pie or by launching the application a second time, you can open its settings menu. When started for the first time Gnome-Pie generates some example Pies. Feel free to use them as a starting point for your custom configuration!
Adding Slices via Drag’n’Drop
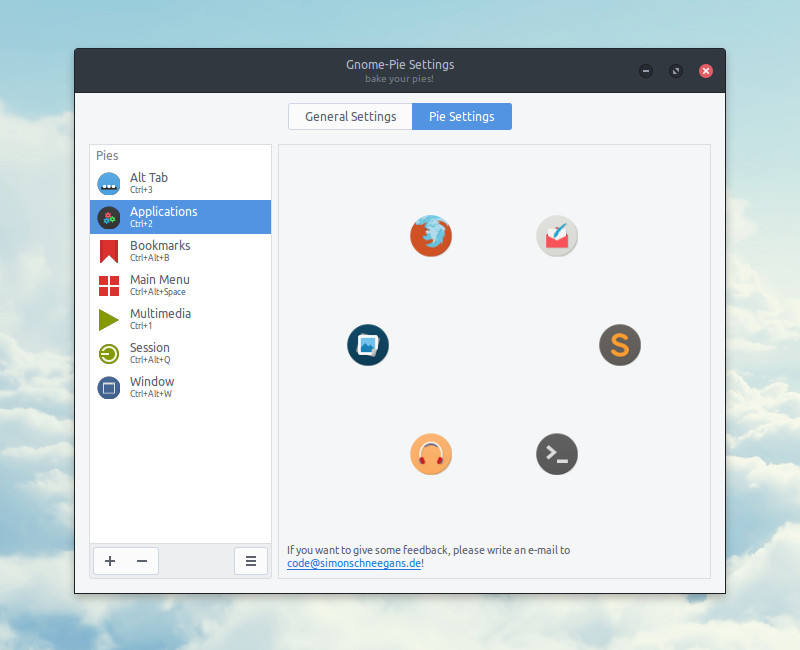 Here you can set up your Pies. All your Pies are listed on the left — you can add new or delete existing pies with the little plus and minus sign in the lower left-hand corner. On the right is a preview of each Pie. Simply drag and drop the Slices to reorder them.
You can drag stuff from your computer to this preview in order to add it to the Pie. You can drag almost anything there:
- Applications from your main menu
- Applications from
/usr/share/applications - Files and folders
- Links and bookmarks from your browser
Adding Slices manually
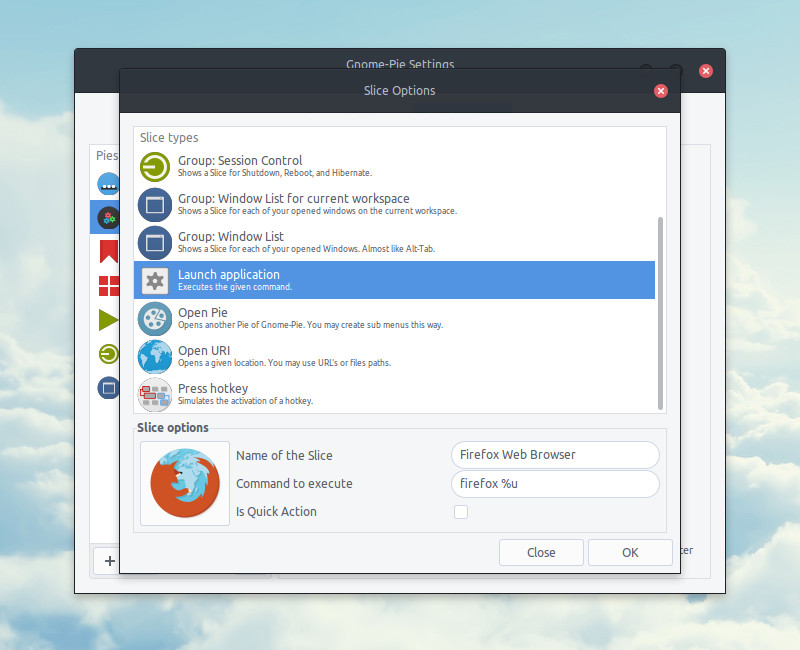 There is also a little button between two Slices which allows you to add new Slices manually. This way you can add other action types to your Pie:
- Simulate key press
- A group of slices, one for each open window (allows for application switching, almost like Alt-Tab) or one for each open window of your current workspace only
- Slices for rebooting or shutting off your computer
- Slices for your file browser bookmarks
- Slices for your recent clipboard entries
Adjusting Pie Options
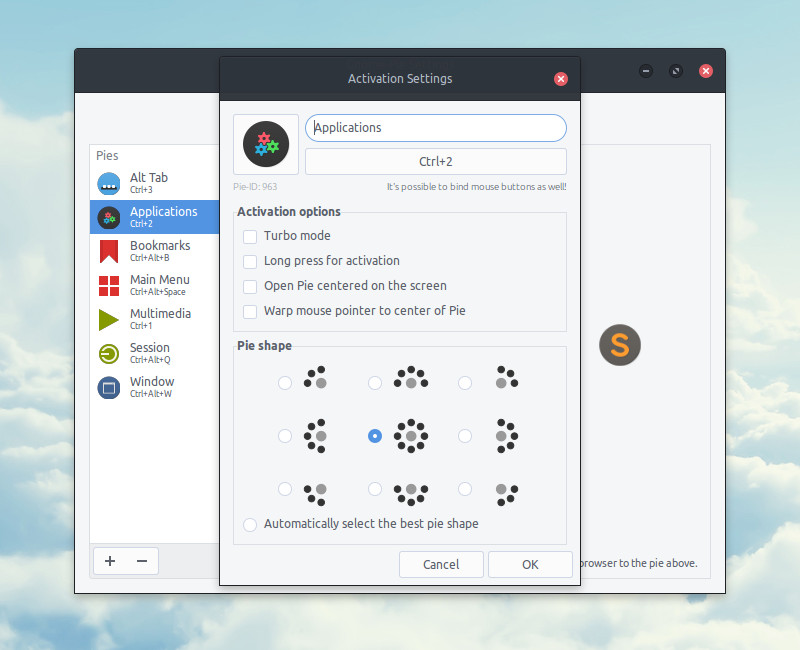 You can change some settings for each Pie by double-clicking the Pie in the list on the left. There you can assign a new hotkey for the Pie, select the icon, specify the name and adjust other options, for example you can change the shape of the Pie.
General Options
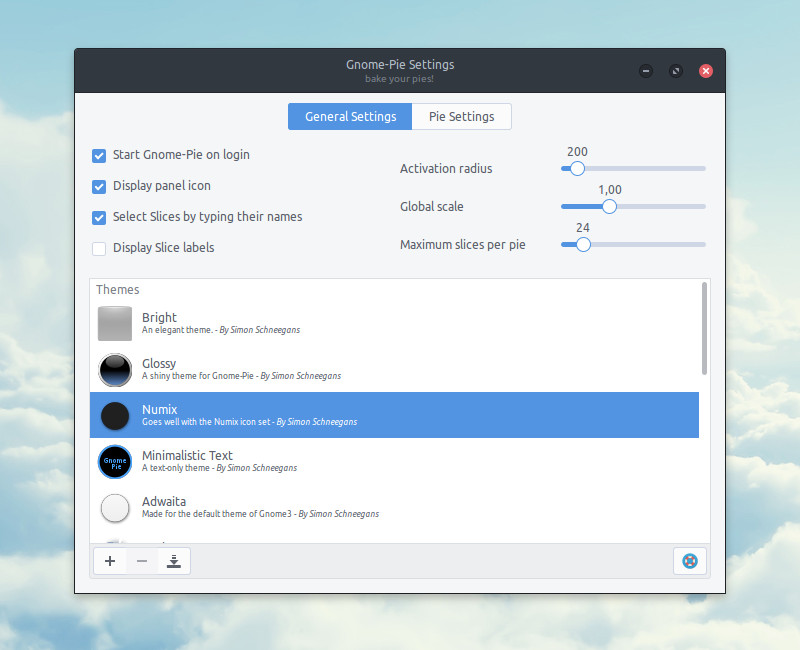 By clicking on the “General Settings”-button in the tool bar, you can specify some behavior options. For instance you can enable Startup on Login or set a Global Scale factor. Additionally you can limit the maximum number of displayed items per Pie and a distance beyond which Slices cannot be selected. Furthermore you can select a theme which skins all of your pies to match your taste.
Advanced Usage
It’s not comfortable to press a complicated key stroke in order to open a pie. Here I present several ways which make the usage of Gnome-Pie much more fluent. All of these are based on one feature of Gnome-Pie: You can open any pie with a terminal command:
gnome-pie -o 123Where 123 is the ID of the desired pie. The ID of each pie is displayed in the pie settings menu, below the icon select button. These ID’s are chosen randomly, so your ID’s may be different to mine.
Opening pies with gestures
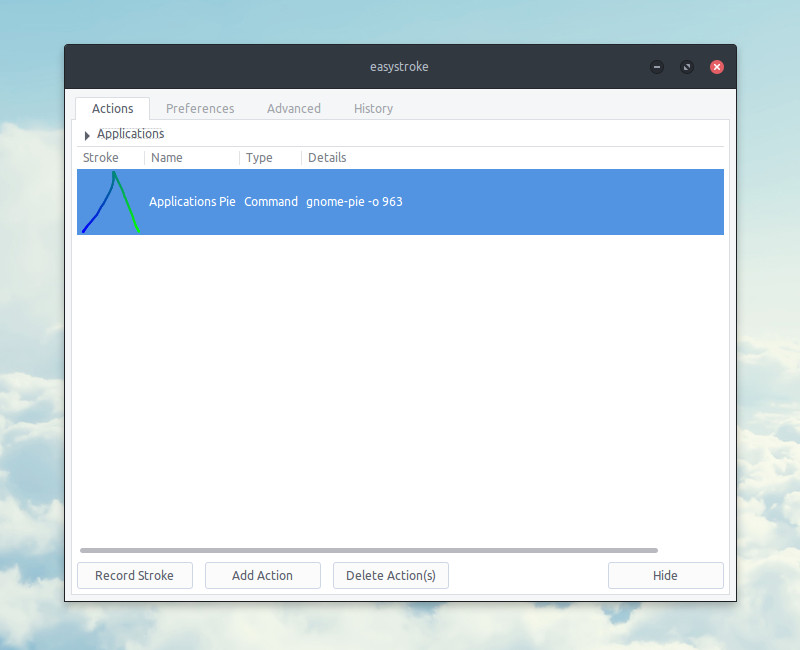 With the open source application Easystroke you can easily execute any command when performing a user defined action. You can install this tool and bind each pie you want to a gesture. For example you may draw a big B on your screen to open the bookmarks-pie. It’s easy to set up and really cool!
Easystroke has an interface which is quite to understand. If you want some additional information you can have a look at the official documentation.
Opening pies with a Launcher
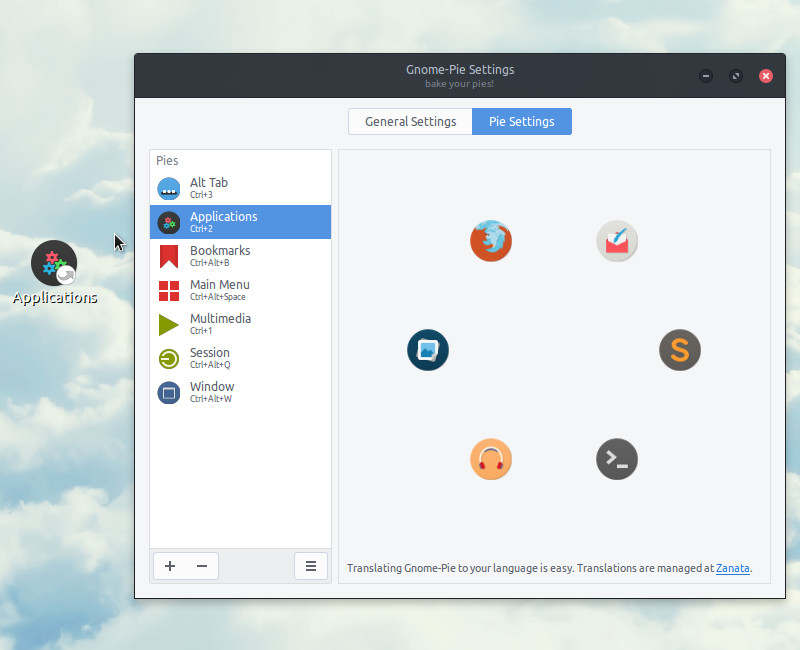 You can also create a launcher on your desktop which opens pies. Simply drag’n’drop a pie from the configuration menu to your desktop. Where you dropped the pie, a launcher will appear. Clicking on this launcher will then open your pie. Maybe you can drag’n’drop this launcher to your panel/dock/whats-o-ever to suit your needs!
Getting involved

I need your help!
I really like working on Gnome-Pie — and you can help improving it! There are many people sending mails to me, praising the possibilities Gnome-Pie offers to them. But I think it can be even better! Let’s try to improve this piece of software together! There are multiple things you can do in order to become a part of Gnome-Pie’s history:
Report bugs!
For me it’s the first project involving Vala, Gtk and Cairo. I never used these tools before, so I assume there is much to be improved. The easiest way to get involved is to fork the project on Github. Or send an e-mail to code(at)simonschneegans.de. If you want to report a bug, please open an issue at the project page at github.com.
Translate Gnome-Pie!
This is really easy: There is an how-to available!
Code for Gnome-Pie!
If you know Vala or are willing to learn (it’s incredibly easy, like C# — you’ll love this language if you happen to know C++ or Java), you may check the issues at Github.com. Or you may introduce a total new feature you always wanted in Gnome-Pie!
Donate!
If you can’t afford the time to do the stuff mentioned above, but still want to help — you can help improving this software by buying some drinks for a poor student! You can do this with Flattr or by donating via PayPal. If you happen to dislike PayPal, send a mail to code@simonschneegans.de and we can chat about this!
The code of Gnome-Pie
If you want to write code for Gnome-Pie, please have a look at the existing files concerning style. I tried to adopt some common Vala guidelines while defining my own style. It’s not always consistent but I try to follow at least most of the time some simple rules:
- Tab-width: Four spaces. Please insert spaces instead of tabs.
- No line should be longer than 100 characters.
- The code should be formatted in Java-style (see example below).
- Member variables should be declared before methods.
- Public before private.
- CamelCase for class names, underscore_separated for all other identifiers.
- Comments describing entire classes/methods/members should be in doxygen-style (see example below).
An example of well-formatted code:
///////////////////////////////////////////////
/// Some cool method.
///////////////////////////////////////////////

public string does_cool_stuff(int input) {
    string local_variable = "";

    // this is the mighty part!
    if (input < 0) {
        local_variable = "%u".printf(-input);
    } else {
        local_variable = "%u".printf(input);
    }

    return local_variable;
}